Speech-to-text and translation is one of the innovative features PlugNmeet offers for online video conferencing systems. All of our registered users can receive a free 10-minute credit service. This allows you to test and experience its remarkable capabilities firsthand. If you wish to use this feature for any of your meetings, teaching sessions, or conferences, you can purchase a package here.
Below, I will provide brief instructions on how it works.
Step 1, Enable Speech to text

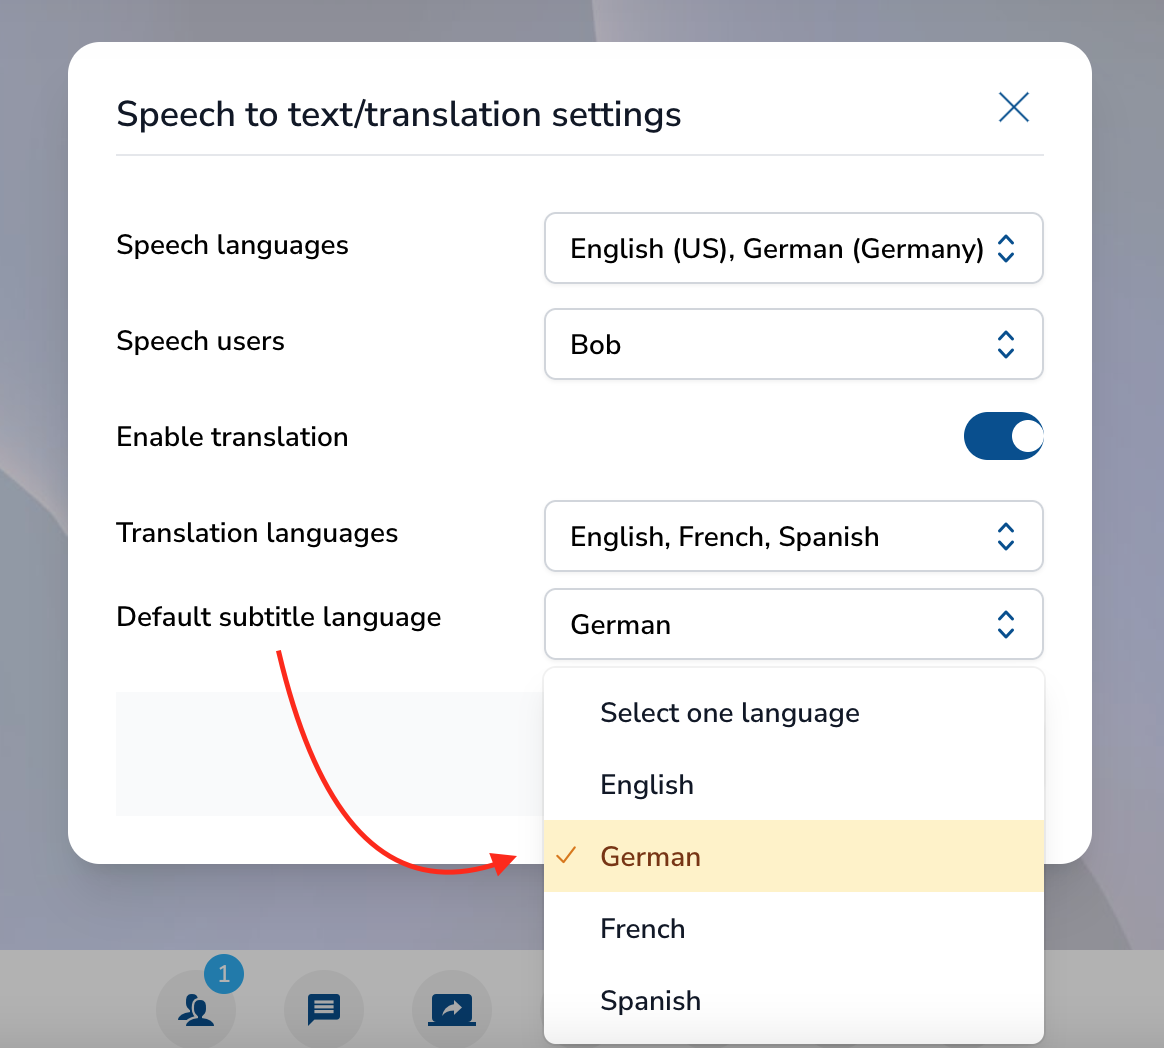
A window will pop up, enabling you to configure the global settings for this feature within the meeting room.

Speech Languages: In this section, you can configure the languages that the system should recognize for speech-to-text conversion. You have the option to select multiple languages. Users will be able to see all available language options when setting up their individual preferences later on.
Speech Users: Here you can specify which users are permitted to use the speech recognition feature. Only the voices of selected users will be converted from speech to text. Users who are not selected will still be able to view the subtitles, but their voices will not be converted to text or translated.
Enable Translation (Yes/No): You can choose whether to activate the translation feature.
If "Yes" is selected for translation:
Translation Languages: Select the target language(s) for translation. Multiple languages can be chosen. Users will be able to see all the available language options when configuring their settings individually later on.
Default Subtitle Language: This setting determines the default language for subtitles for all users. Once configured, all attendees who join will see subtitles in this default language without needing to adjust any settings themselves.
These settings allow for a high degree of customization to cater to the diverse linguistic needs of your meeting participants, ensuring clear and effective communication during your online video conferences.
Step 2, Configure user settings for Moderator /individual user
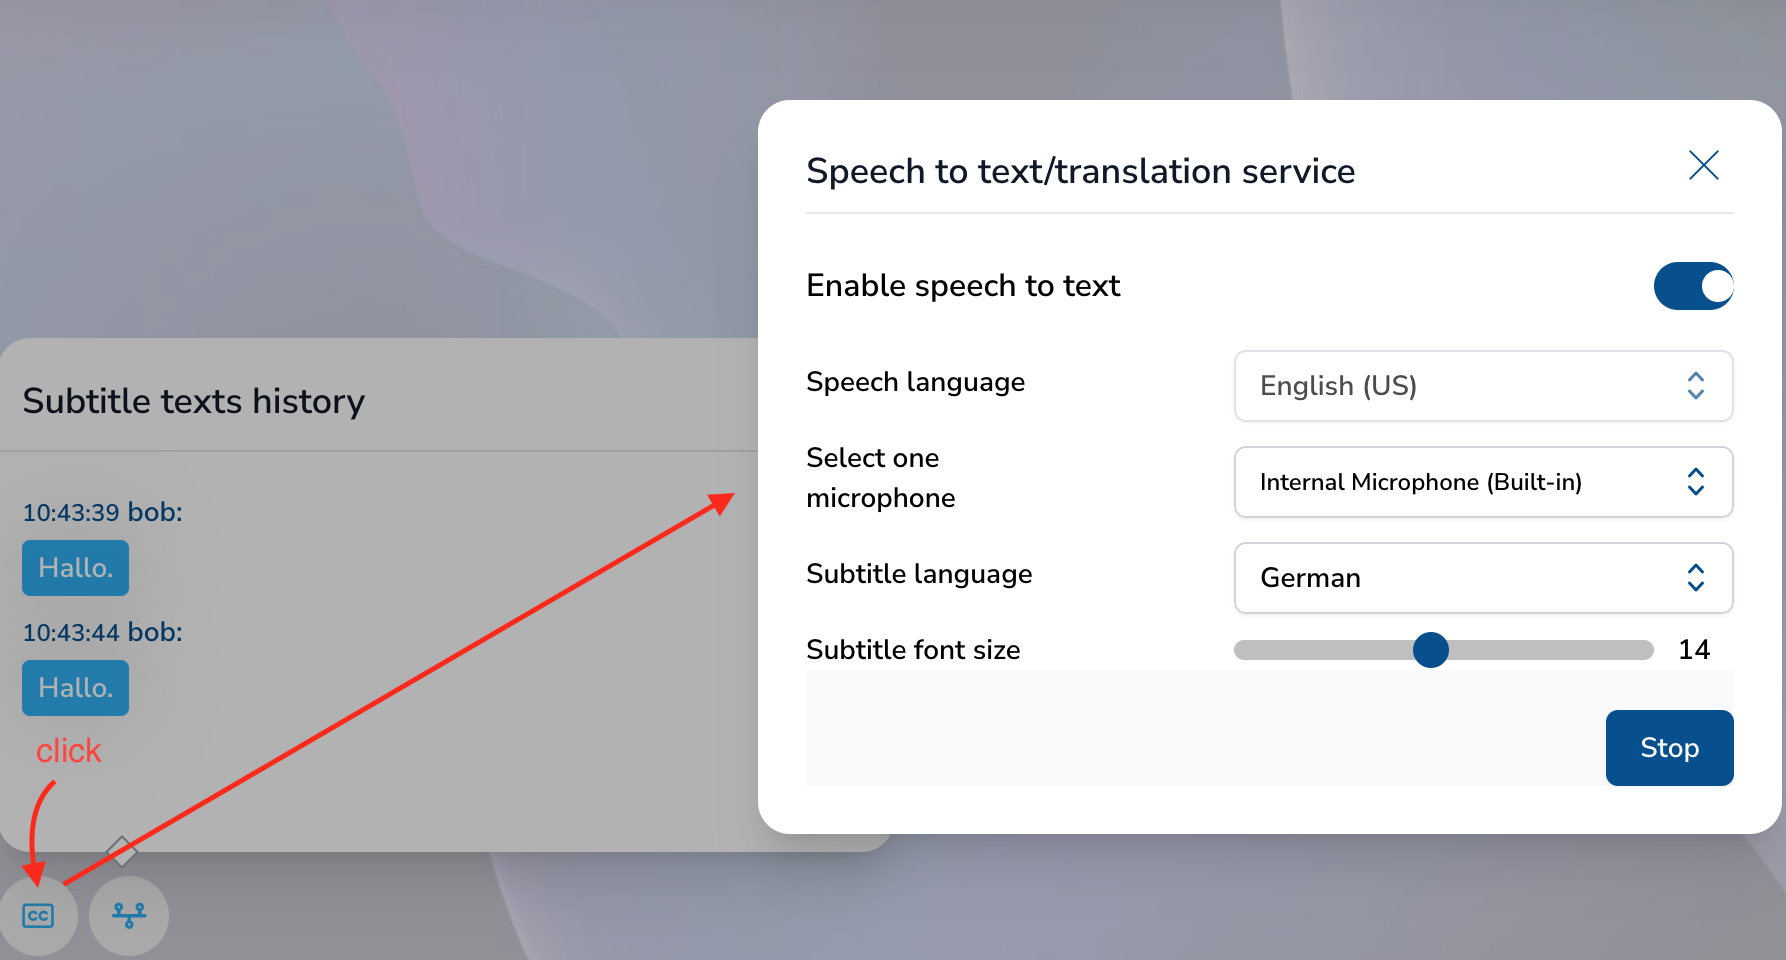
You will find a "CC" (Closed Caption) icon located at the bottom left of the page. By clicking this icon, a window will appear, providing you with the option to configure the settings for either moderator-level or individual user preferences. Here, you can select the languages spoken by users and the subtitle language that they wish to see displayed.

Once you have configured your settings, click 'Start' to begin enjoying the speech-to-text and translation features in your meeting room.
Note: For moderators, after enabling the speech-to-text service, you must click on the CC (Closed Caption) icon to configure your individual settings. This step is essential to fully activate the speech-to-text service. This requirement is exclusive to moderators; other attendees do not need to take this action and will automatically see the default subtitles upon joining the meeting room.